How to create a Swift Package from a C++ library

This tutorial will guide you through the process of creating your own Swift Package. It will provide bindings for a popular C++ linear algebra library — Eigen. For simplicity’s sake, only a subset of Eigen’s functionality will be ported to Swift.
Challenges of C++ and Swift Interop
C++ to Swift bindings are a complicated story that heavily depends on what kind of C++ code you wish to port. These two languages do not have apparent one-to-one API mapping. While there are automatic binding solutions present (e.g. Scapix, Gluecodium), they can successfully map only a subset of C++ language. You may benefit from such binding solutions if you are a library developer who is willing to write code that is easily convertible to other languages. However, if you wish to use a third-party library, then usually you are in for a rough ride. In such cases, you might have only one choice - write bindings manually.
Swift's team already provides C and Objective-C interoperability in their toolchains. At the same time, C++ interop has a manifest with no clear implementation timeline. This manifest discusses possible designs and tradeoffs for C++ and Swift interoperability. One of the most challenging issues is importing templates. It may seem that C++ templates and Swift generics are similar. However, they have important differences. At the time of writing, Swift doesn't support non-type template parameters, template template parameters, and parameter packs. Also, Swift generics are constraint-based (similar to C++20 concepts). At the same time, C++ templates perform syntactic substitution, i.e. attempt to substitute template with concrete type at the call site and see if the type supports the syntax invoked in the template. All in all, if you wish to call heavily templated C++ library from Swift, tough luck!
Problem Setup
Let's try to make manual bindings for a heavily templated C++ library Eigen. This a popular library for linear algebra: matrices, vectors, numerical solvers, and related algorithms. The basic strategy for the wrapper will be as follows: pick a concrete type, wrap it into Objective-C class which will be imported to Swift.
One of the ways to import Objective-C API to Swift is adding C++ library directly to Xcode project and providing a bridging header. However, you usually want your wrapper to compile as a separate module. In this case, you need the help of a package manager. Swift's team heavily promotes Swift Package Manager (SPM). Historically, SPM lacked some features which prohibited many developers from migrating to it. However, it imporved drastically over the years. In Xcode 12 you can finally bundle resources with your package and even use a package in a Swift playground.
In this tutorial, we'll create an SPM package SwiftyEigen. As a concrete type to use, we'll take a floating-point matrix with an arbitrary number of rows and columns. The Matrix class will have an initializer, subscript and inverse method that calculates the inverse of a matrix. The complete project is hosted at https://github.com/ksemianov/SwiftyEigen.
Project Structure
SPM has a useful template for creating a new library:
foo@bar:~$ mkdir SwiftyEigen && cd SwiftyEigen
foo@bar:~/SwiftyEigen$ swift package init
foo@bar:~/SwiftyEigen$ git init && git add . && git commit -m 'Initial commit'
Then we add our third-party library Eigen as submodule:
foo@bar:~/SwiftyEigen$ git submodule add https://gitlab.com/libeigen/eigen Sources/CPP
foo@bar:~/SwiftyEigen$ cd Sources/CPP && git checkout 3.3.9
Then we'll edit our package manifest Package.swift:
// swift-tools-version:5.3

import PackageDescription

let package = Package(
    name: "SwiftyEigen",
    products: [
        .library(
            name: "SwiftyEigen",
            targets: ["ObjCEigen", "SwiftyEigen"]
        )
    ],
    dependencies: [],
    targets: [
        .target(
            name: "ObjCEigen",
            path: "Sources/ObjC",
            cxxSettings: [
                .headerSearchPath("../CPP/"),
                .define("EIGEN_MPL2_ONLY")
            ]
        ),
        .target(
            name: "SwiftyEigen",
            dependencies: ["ObjCEigen"],
            path: "Sources/Swift"
        )
    ]
)
This package manifest is a recipe for package compilation. Swift build system will compile two separate targets for Objective-C and Swift. SPM doesn't allow mixing these two languages in the same target. ObjCEigen target uses sources from Sources/ObjC folder, adds Sources/CPP folder to header search paths and defines "EIGENMPL2ONLY" to guarantee MPL2 license when using Eigen. SwiftyEigen target depends on ObjCEigen and uses sources from Sources/Swift folder.
Manual Bindings
No we provide a header for our Objective-C class and put it inside Sources/ObjCEigen/include folder:
#pragma once

#import <Foundation/Foundation.h>

NS_ASSUME_NONNULL_BEGIN

@interface EIGMatrix: NSObject

@property (readonly) ptrdiff_t rows;
@property (readonly) ptrdiff_t cols;

- (instancetype)init NS_UNAVAILABLE;
+ (instancetype)matrixWithZeros:(ptrdiff_t)rows cols:(ptrdiff_t)cols
NS_SWIFT_NAME(zeros(rows:cols:));
+ (instancetype)matrixWithIdentity:(ptrdiff_t)rows cols:(ptrdiff_t)cols
NS_SWIFT_NAME(identity(rows:cols:));

- (float)valueAtRow:(ptrdiff_t)row col:(ptrdiff_t)col
NS_SWIFT_NAME(value(row:col:));
- (void)setValue:(float)value row:(ptrdiff_t)row col:(ptrdiff_t)col
NS_SWIFT_NAME(setValue(_:row:col:));

- (EIGMatrix*)inverse;

@end

NS_ASSUME_NONNULL_END
We have rows, and cols get properties, initializer with zeros and with identity, ways to get and set individual values and inverse method.
Implementation in Sources/ObjCEigen folder:
#import "EIGMatrix.h"

#pragma clang diagnostic push
#pragma clang diagnostic ignored "-Wdocumentation"
#import <Eigen/Dense>
#pragma clang diagnostic pop

#import <iostream>

using Matrix = Eigen::Matrix<float, Eigen::Dynamic, Eigen::Dynamic>;
using Map = Eigen::Map<Matrix>;

@interface EIGMatrix ()

@property (readonly) Matrix matrix;

- (instancetype)initWithMatrix:(Matrix)matrix;

@end

@implementation EIGMatrix

- (instancetype)initWithMatrix:(Matrix)matrix {
    self = [super init];
    _matrix = matrix;
    return self;
}

- (ptrdiff_t)rows {
    return _matrix.rows();
}

- (ptrdiff_t)cols {
    return _matrix.cols();
}

+ (instancetype)matrixWithZeros:(ptrdiff_t)rows cols:(ptrdiff_t)cols {
    return [[EIGMatrix alloc] initWithMatrix:Matrix::Zero(rows, cols)];
}

+ (instancetype)matrixWithIdentity:(ptrdiff_t)rows cols:(ptrdiff_t)cols {
    return [[EIGMatrix alloc] initWithMatrix:Matrix::Identity(rows, cols)];
}

- (float)valueAtRow:(ptrdiff_t)row col:(ptrdiff_t)col {
    return _matrix(row, col);
}

- (void)setValue:(float)value row:(ptrdiff_t)row col:(ptrdiff_t)col {
    _matrix(row, col) = value;
}

- (instancetype)inverse {
    const Matrix result = _matrix.inverse();
    return [[EIGMatrix alloc] initWithMatrix:result];
}

- (NSString*)description {
    std::stringstream buffer;
    buffer << _matrix;
    const std::string string = buffer.str();
    return [NSString stringWithUTF8String:string.c_str()];
}

@end
Now we expose our Objective-C code to Swift in Sources/Swift (for more info see Swift Forums):
@_exported import ObjCEigen
And provide a subscript for cleaner API:
extension EIGMatrix {
    public subscript(row: Int, col: Int) -> Float {
        get { return value(row: row, col: col) }
        set { setValue(newValue, row: row, col: col) }
    }
}
Usage Example
Now we can use this class as follows:
import SwiftyEigen

// Create a new 3x3 identity matrix
let matrix = EIGMatrix.identity(rows: 3, cols: 3)

// Change a specific value
let row = 0
let col = 1
matrix[row, col] = -2

// Calculate the inverse of a matrix
let inverseMatrix = matrix.inverse()
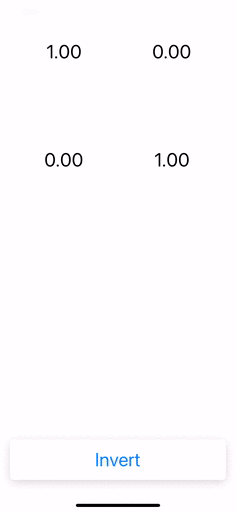
Finally, we can create a simple example project which showcases the capabilities of our wrapper library SwiftyEigen. It will allow to enter values for a 2x2 matrix and then calculate its inverse. For this you create a new iOS project in Xcode, drag-and-drop the package's folder from finder to Project navigator to add a local dependency, and add the SwiftyEigen framework in Example target's general settings. Then we write the UI and finish the project:
See complete code on GitHub.
References
- SwiftyEigen Project
- Eigen Linear Algebra Library
- Swift Package Manager
- C/Swift Interop
- Objective-C/Swift Interop
- Objective-C Bridging Header
- C++/Swift Interop Manifest
- C++20 Concepts
- Automatic Bridging Solutions
Thank you for reading!